

Scratchboard Tools & Materials
Below you'll find a breakdown of the key tools I use in every scratchboard artwork, as well as some insights into how and why I use them. Whether you're just getting started or looking to expand your toolkit, this guide should help.
Ampersand Scratchboard
All of my scratchboard work is done on Ampersand Scratchboards, which offer a consistent, high-quality surface for detailed, professional-level work. These boards feature a clay-coated hardboard panel with a layer of black India ink on top, making them ideal for controlled, precise scratching and re-inking. Their durability and responsiveness are unmatched, and they’re the standard surface I recommend for anyone serious about scratchboard art.
X-Acto Knife / Craft Knife (No. 11 Blade)
This is my go-to tool, used in every single artwork I create. The fine, sharp point is ideal for creating thin lines, subtle fur textures, and controlled cross-hatching. It also doubles as a stippling tool when used with just the tip. With simple pressure control, you can achieve anything from faint highlights to bright, crisp marks.
Essdee Scraper Tool
This versatile tool comes with interchangeable nibs, allowing you to swap tips quickly depending on the effect you want.
Pointed nibs are excellent for stippling or delicate detail work.
Curved nibs remove more ink and are perfect for broader, brighter marks—great for sunlit fur or areas needing a softer fade into the background.
Tattoo Needles
Tattoo needles come in a wide range of configurations, and experimenting is key to finding what suits your technique. I use:
1RL (Round Liner): Ideal for ultra-fine fur strands.
7RL / 9RL: These larger groupings help create soft fur or speed up cross-hatching and stippling in wider areas.
5M1 (Weaved Magnum): Useful for quickly laying down a base layer of fur texture.
Fiberglass Brushes
I use both small and large fiberglass brushes depending on the scale of the work. These are great for softening fur or smoothing stippled areas without overworking the surface. Ideal for larger mammals or background blending.
Other Useful Tools
Ink Erasers – Useful for subtle corrections or reworking re-inked areas.
Fine Grade Sandpaper – Can soften harsh textures or assist in creating atmospheric effects.
Steel Wool – Excellent for blending and smoothing large areas.
Microblading Needles – Great for intricate fur or directional textures.
Sewing Needles & Scalpels – Perfect for highly controlled marks or experimental effects.
There’s no one-size-fits-all approach. The best way to discover your preferred tools is to test and experiment—see what works with your subject matter and technique.
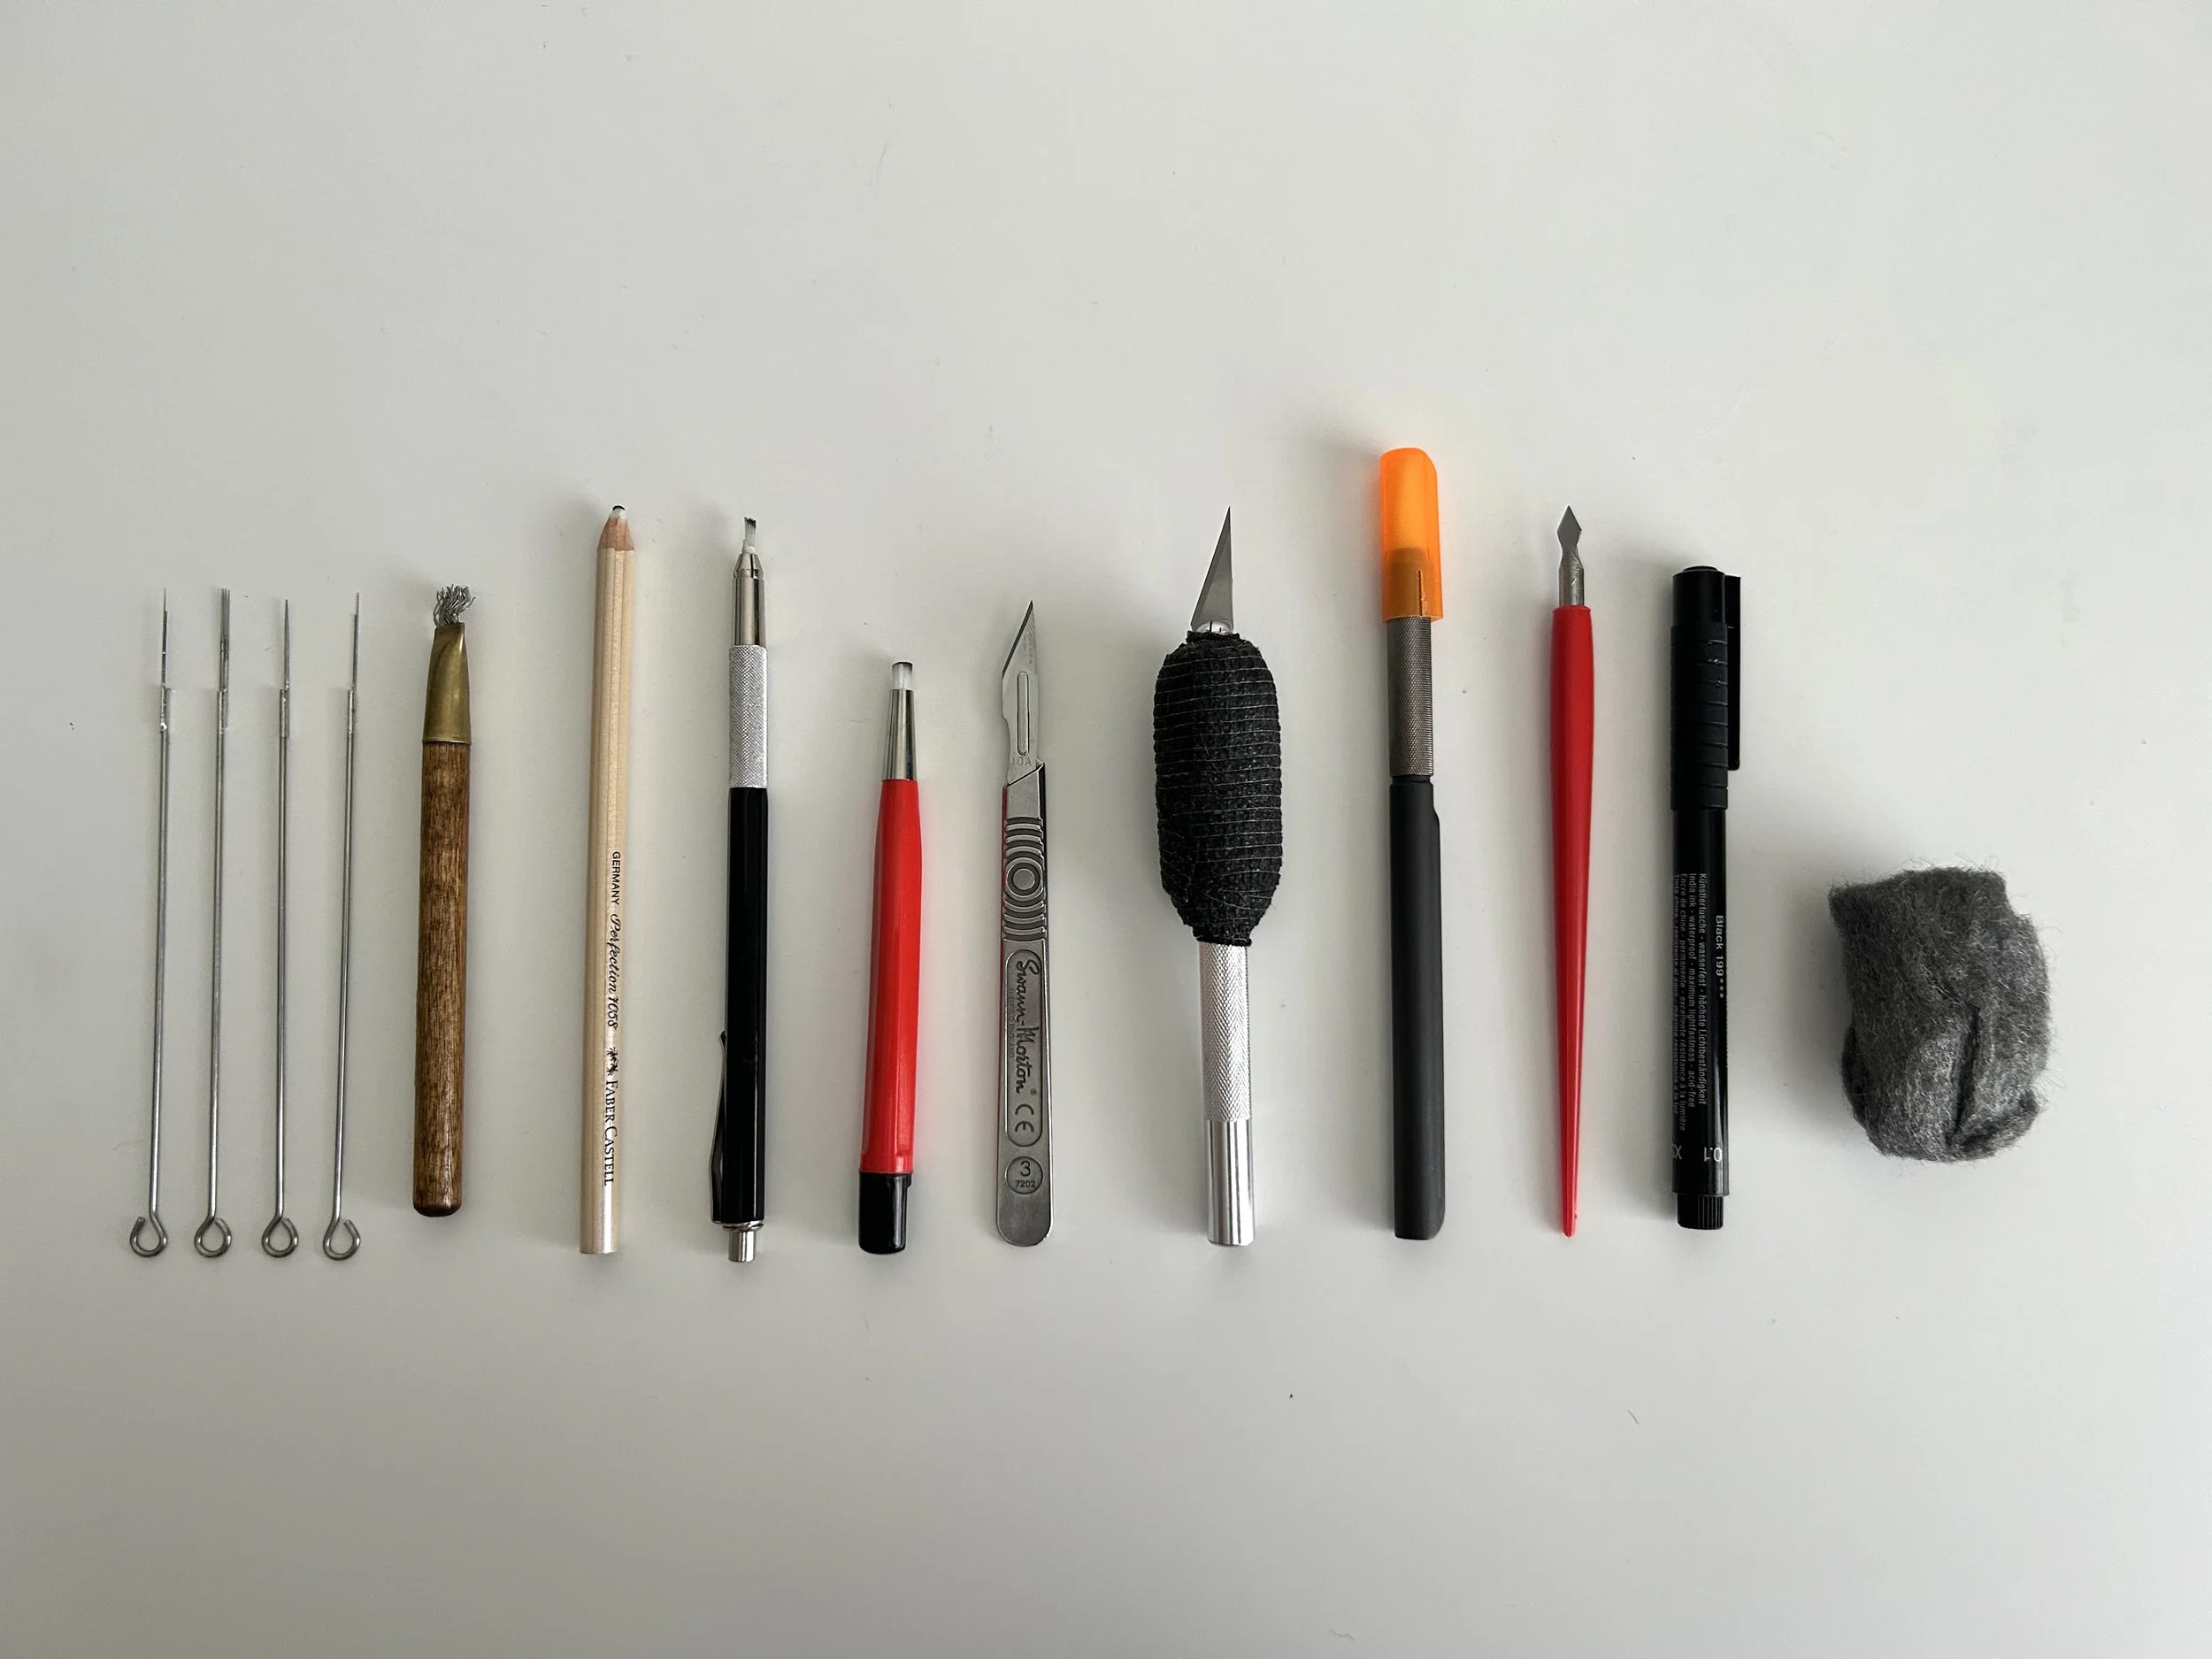
Tools Featured in the Photo (Left to Right):
Assortment of Tattoo Needles
Wire Brush
Ink Eraser Pencil
Small Fiberglass Brush
Large Fiberglass Brush
Swann Morton Scalpel (craft knife)
Simple Craft Knife
SLICE Craft Knife (Ceramic Blade)
Essdee Tool / Blade
Faber-Castell Pitt Artist Pen
Wire Wool